My gal pal, Cassie of Hi Sugarplum, is a superstar when it comes to creating high-end trendy looks, on a shoestring budget. She also has a love for bold colors, so I always get excited to see what she is up to and I just lovity love her style (in both home and fashion). She is stopping by today to share with us her super savvy solution for corralling her daughter's favorite reading materials (but this could totally work for little boys and adults as well!) Take it away Cassie!

Hey there, friends! I'm excited to be back over here on Jen's gorgeous blog...a place of so much creativity and ingenuity! Not to mention, she's got some of the sweetest readers around! Speaking of readers (how you like that segue?!), my daughter recently graduated to 'chapter books', and all of a sudden, she can't get enough of books and reading time!
Obviously, this makes a mama's heart happy, and I want to do everything I can to encourage her. When we created her Big Girl Room, we carved out a secret reading nook, but her room was lacking in bookshelves. I looked around online, and fell instantly in love with this Land of Nod book caddy...but didn't love the $150 price tag! #ouch Plus, it's a little too big for her small room.
So I decided to get crafty and create my own out of a bamboo drying rack! It's available at various retailers, but I picked up this one from Container Store.

A few quick coats of bright yellow high gloss spray paint, and a book caddy was born! Oh, and did I mention it was only $20!? #score


It's sturdy enough to hold her heavier hard-back books, but still folds up and tucks away when you need a tidier space.


Each week, she loads it up with new favorites, then has them all at her fingertips. I love to see what books she chooses, as well as the other treasures she stores in it. I'm thinking of making another one to hold magazines in our family room.

Do you remember the Little Miss series? These were mine as a child, and I still remember my grandfather reading them to me. I love that she wants to hang on to them, even though her reading level has grown.

We currently keep the book caddy near her art center (which I cleaned up for pictures, don't be fooled into thinking she's this tidy!), so it's a whole corner of imagination and creativity!


Is there anything better than seeing your kiddo voluntarily reading? Or the peace and quiet that comes with it?! ;) Thanks for letting me share! I'd love to hear how you corral all the books in your kid's rooms.

 "Hi, I'm Cassie, a DIY and design-obsessed Texas girl, and lover of travel, fashion, sarcasm and Mexican food. When I'm not hanging with my sweet and funny family, you can find me kicking the '80s out of our home, one budget project at a time, on my blog Hi Sugarplum!"
Hey there, friends! I'm excited to be back over here on Jen's gorgeous blog...a place of so much creativity and ingenuity! Not to mention, she's got some of the sweetest readers around! Speaking of readers (how you like that segue?!), my daughter recently graduated to 'chapter books', and all of a sudden, she can't get enough of books and reading time!
Obviously, this makes a mama's heart happy, and I want to do everything I can to encourage her. When we created her Big Girl Room, we carved out a secret reading nook, but her room was lacking in bookshelves. I looked around online, and fell instantly in love with this Land of Nod book caddy...but didn't love the $150 price tag! #ouch Plus, it's a little too big for her small room.
So I decided to get crafty and create my own out of a bamboo drying rack! It's available at various retailers, but I picked up this one from Container Store.
A few quick coats of bright yellow high gloss spray paint, and a book caddy was born! Oh, and did I mention it was only $20!? #score
It's sturdy enough to hold her heavier hard-back books, but still folds up and tucks away when you need a tidier space.
Each week, she loads it up with new favorites, then has them all at her fingertips. I love to see what books she chooses, as well as the other treasures she stores in it. I'm thinking of making another one to hold magazines in our family room.
Do you remember the Little Miss series? These were mine as a child, and I still remember my grandfather reading them to me. I love that she wants to hang on to them, even though her reading level has grown.
We currently keep the book caddy near her art center (which I cleaned up for pictures, don't be fooled into thinking she's this tidy!), so it's a whole corner of imagination and creativity!
Is there anything better than seeing your kiddo voluntarily reading? Or the peace and quiet that comes with it?! ;) Thanks for letting me share! I'd love to hear how you corral all the books in your kid's rooms.

It has been awhile since we have taken a look at a beautifully organized walk-in closet around here. Well, today's eye candy of a closet will make up for the months we have been without. Totally worth the wait!

When it comes to marrying function and fabulous, Julia from Cuckoo 4 Design is an all time champion. She recently gave her walk-in closet some glitz and glam and now it shines brighter than any star in the closet universe. I just love every last blingy detail and I couldn't wait to show how some simple touches can make a huge impact. For many, the walk-in closet is one of the first spaces that is seen in the morning. It can make or break your day, so giving it a little attention will go along way in more ways than one.
What is the main function of your space?

"It is my walk-in closet and I also store our linens in it. My husband and I are fortunate enough to each have our own walk-in closets, which is a major plus in our small home. You don't come across such a great feature too often in a standard sized suburban home. But my husband's closet is an entirely different story and job, I don't know if I will ever go there. But never say never, right?"
Any superstar tips for keeping it organized?
"Now I don't know if it is a superstar tip but for me the key is to not overdo it when I organize because I know I can't keep up with it when I'm in a hurry. That's why I didn't label the boxes. I know I wouldn't keep up with relabeling the frequent change in content (ain't nobody have time for that). I love hurrying through my house and packing things away in a rush. So the fastest and easiest way is key for me to keep something "somewhat organized". The boxes have a clear plastic window and I can see what is in them which works great for me.
One of my favorite tricks to make it look bigger is the floor-mirror behind the clothing on the far wall of the closet. You can read and see more about it here."
What items did you find were essential when organizing the space, and why?

"The most important items to me in my closet are the Ikea boxes that I placed on the upper shelves. They play a huge roll in making the tiny closet look less cluttered. Can you imagine having to stack all the seasonal clothing and sheets that I need to store in there on all the shelves? I've been there and it wasn't pretty. Stuff starts to tumble down, I got angry, shoved or threw it back up. On top of it I'm short and stacking stuff up high isn't all that easy even with a ladder. I keep a small foldable step ladder right beside the dresser now and whenever I need something I use it and pull the particular box. So much easier!"
What did you do to go the extra mile and "Make it Pretty"?

"Since my husband and I are always considering moving one day, it was in no way reasonable for me to throw out perfectly fine wire shelving. The type of shelving that is so hated in the design community but functions quite well if you ask me. So I tried to work with it and to come up with a solution to draw your eye away from that said shelving. That's when I thought about wallpapering the ceiling to draw your eye up."
What items did you DIY to stay on a budget?

"I pretty much always try to work with what I have first, that's why I painted the existing boxes. Some of the boxes had to get cut down to fit on the shelving.
I also painted the cheap Ikea light fixture and wallpapered the ceiling."
How has this space impacted your life for the better?

"I once again love walking into my closet to pick out what I'm going to wear. It's a delight to finally not have to search for a particular piece and purging has created so much space for me to feel like I can breath in that tiny dark space again. Well now it's not dark anymore because I smile every time I look at my bold ceiling and light fixture."

And if you love this closet, you will also want to pop over to Julia's blog and check out her graphic coat closet here.

I love that Julia recognizes what works for her when it comes to organizing. Do I love a good label when it makes sense? Absolutely. But she recognized that they don't work for her in this space, so she skipped them. The lack of labels doesn't mean she is not organized, in fact, she is most likely more organized now that she uses the boxes to corral different types of belongings. It just shows that if it doesn't make sense in the terms of time and long term maintenance, don't do it for the sake of doing it. Instead, she used clear faced boxes which allows her to see the contents from below.
And let's take a moment to focus on the functionality of those pretty painted boxes for a minute. I couldn't agree more that tipping stacks and piles of linens and clothing can cause crabbiness and flusters. The boxes streamline the look, keep like items together and prevent any toppling, tipping or mixing of piles. Simple and effective.
We always talk about adding mirrors to rooms to bounce light and expand the space, same effect works in small closets as well! Such a great tip!
Nothing in this closet is too fussy or complicated; simple hooks to hang necklaces, a clear tray to hold jewelry, boxes to conceal accessories, painted storage boxes to add a little color... And my guess is that the small personal touches will keep Julia motivated to maintain that amazing space. And can you imagine strolling into the closet and catching a glimpse of that off-the-charts incredible wallpaper on the ceiling? That graphic statement is so playful and unexpected, I couldn't love it more! Now I am eying up all of the ceilings throughout our home... enter evil laugh here.
One last bit of motivation to go the extra mile when working on a space, check out Julia's closet before and after:

You can find Julia's closet makeover here, and stick around to tour her beautiful home here.

When it comes to marrying function and fabulous, Julia from Cuckoo 4 Design is an all time champion. She recently gave her walk-in closet some glitz and glam and now it shines brighter than any star in the closet universe. I just love every last blingy detail and I couldn't wait to show how some simple touches can make a huge impact. For many, the walk-in closet is one of the first spaces that is seen in the morning. It can make or break your day, so giving it a little attention will go along way in more ways than one.
What is the main function of your space?
"It is my walk-in closet and I also store our linens in it. My husband and I are fortunate enough to each have our own walk-in closets, which is a major plus in our small home. You don't come across such a great feature too often in a standard sized suburban home. But my husband's closet is an entirely different story and job, I don't know if I will ever go there. But never say never, right?"
Any superstar tips for keeping it organized?
"Now I don't know if it is a superstar tip but for me the key is to not overdo it when I organize because I know I can't keep up with it when I'm in a hurry. That's why I didn't label the boxes. I know I wouldn't keep up with relabeling the frequent change in content (ain't nobody have time for that). I love hurrying through my house and packing things away in a rush. So the fastest and easiest way is key for me to keep something "somewhat organized". The boxes have a clear plastic window and I can see what is in them which works great for me.
One of my favorite tricks to make it look bigger is the floor-mirror behind the clothing on the far wall of the closet. You can read and see more about it here."
What items did you find were essential when organizing the space, and why?
"The most important items to me in my closet are the Ikea boxes that I placed on the upper shelves. They play a huge roll in making the tiny closet look less cluttered. Can you imagine having to stack all the seasonal clothing and sheets that I need to store in there on all the shelves? I've been there and it wasn't pretty. Stuff starts to tumble down, I got angry, shoved or threw it back up. On top of it I'm short and stacking stuff up high isn't all that easy even with a ladder. I keep a small foldable step ladder right beside the dresser now and whenever I need something I use it and pull the particular box. So much easier!"
What did you do to go the extra mile and "Make it Pretty"?
"Since my husband and I are always considering moving one day, it was in no way reasonable for me to throw out perfectly fine wire shelving. The type of shelving that is so hated in the design community but functions quite well if you ask me. So I tried to work with it and to come up with a solution to draw your eye away from that said shelving. That's when I thought about wallpapering the ceiling to draw your eye up."
What items did you DIY to stay on a budget?
"I pretty much always try to work with what I have first, that's why I painted the existing boxes. Some of the boxes had to get cut down to fit on the shelving.
I also painted the cheap Ikea light fixture and wallpapered the ceiling."
How has this space impacted your life for the better?
"I once again love walking into my closet to pick out what I'm going to wear. It's a delight to finally not have to search for a particular piece and purging has created so much space for me to feel like I can breath in that tiny dark space again. Well now it's not dark anymore because I smile every time I look at my bold ceiling and light fixture."
______________________________________________
And if you love this closet, you will also want to pop over to Julia's blog and check out her graphic coat closet here.
I love that Julia recognizes what works for her when it comes to organizing. Do I love a good label when it makes sense? Absolutely. But she recognized that they don't work for her in this space, so she skipped them. The lack of labels doesn't mean she is not organized, in fact, she is most likely more organized now that she uses the boxes to corral different types of belongings. It just shows that if it doesn't make sense in the terms of time and long term maintenance, don't do it for the sake of doing it. Instead, she used clear faced boxes which allows her to see the contents from below.
And let's take a moment to focus on the functionality of those pretty painted boxes for a minute. I couldn't agree more that tipping stacks and piles of linens and clothing can cause crabbiness and flusters. The boxes streamline the look, keep like items together and prevent any toppling, tipping or mixing of piles. Simple and effective.
We always talk about adding mirrors to rooms to bounce light and expand the space, same effect works in small closets as well! Such a great tip!
Nothing in this closet is too fussy or complicated; simple hooks to hang necklaces, a clear tray to hold jewelry, boxes to conceal accessories, painted storage boxes to add a little color... And my guess is that the small personal touches will keep Julia motivated to maintain that amazing space. And can you imagine strolling into the closet and catching a glimpse of that off-the-charts incredible wallpaper on the ceiling? That graphic statement is so playful and unexpected, I couldn't love it more! Now I am eying up all of the ceilings throughout our home... enter evil laugh here.
One last bit of motivation to go the extra mile when working on a space, check out Julia's closet before and after:
You can find Julia's closet makeover here, and stick around to tour her beautiful home here.
* All images courtesy of Cuckoo 4 Design
ATTENTION!! Want to be featured in a Reader Space edition? Have an awesome organizing story to share? I am looking for projects that have made a positive impact to your life, big or small. They can be anything from an organized drawer or cabinet to an entire room. Please submit your story and photos to iheartreaderspace@gmail.com, and I would heart to feature them right here on the blog!! Photos should be high resolution and unedited. Please include a description of the project, including any costs, inspiration, and how it has changed your life and routine for the better! Oh, and no worries my friends, we will NEVER judge "before" pictures because that just wouldn't be nice! Only love goes on at this blog!
I have loved beautiful storage solutions for as long as I can remember. When I was a child, I would take the time to decorate my folders and locker door and I was always rearranging my bedroom and crafting up little storage boxes. I realized that although piles of clutter can be unsightly, a good storage basket or box can create the opposite effect. It can make your heart smile. It can light up your eyes. It can change the mood of an entire space.
We do a lot of DIY projects, big and small, to save money and create personalized and pretty storage solutions all around our home. There are also times when I turn to the pros and appreciate the craft of others. And there is no storage creating talent that I have found to be more lovely than the storage provided by this week's giveaway sponsor. Say hello to Dharma Door!

Founded in 2004 by Australian Shannon Sheedy, The Dharma Door is where Fair Trade meets fine living. After spending a year traveling and teaching throughout Vietnam, Nepal & India, Shannon and her husband Mick followed their dream of creating products that combine good design with ethical production.
Fast-forward nearly ten years and The Dharma Door has grown to become one of the leading sources for contemporary Fair Trade and sustainable homewares throughout Australia and New Zealand. Building their relationships with producer partners and artisans, as well as a network of wholesale and retail clients, they next set their sights on expanding the brand to the US market.

William & Katie Berg first met Shannon & Mick on a bus ride in Vietnam in early 2003. Friendship took root in youthful travel and over the years has grown to include a new business venture, bringing this gorgeous brand to the North American marketplace. Drawing on their backgrounds in French antiques and film production, they bring a unique set of skills to the table. Launched in the spring of 2014, The Dharma Door USA has exceeded all expectations. The first shipment of goods sold out in just a few weeks time. Growing steadily over the next several months, the response from customers across the country has been amazing.

The Dharma Door products are made by hand using traditional techniques in modern forms. All of the artisans work within Fair Trade groups focusing on providing healthcare, education and fair wages. Every item produced is beautifully designed and impeccably crafted - each stitch & fiber tells a story.

It is the mission of The Dharma Door to bring Fair Trade goods to a new marketplace, bridging the gap between ethical production and contemporary style. They believe that our choices as consumers make a difference in the world, from the food we buy, to the products we use & love in our home, small actions lead to big change.
Simply stunning storage at its best, I couldn't love Dharma Door storage more.

This week, TWO of you lucky readers will have the opportunity to add these delightful bins to your own homes.
First winner selected will receive one loomed basket of their choice (which I find makes for amazing portable laundry storage) while the second winner drawn can choose one Hessian Sack and one Hessian Duo Set (perfect for toting around toiletries or craft supplies). Winner's choice of color & pattern.

a Rafflecopter giveaway

IHeart Organizing readers can now receive 15% OFF using code IHEARTORGANIZING at the Dharma Door's Online Website.
Good luck everyone! IHeart Organizing official giveaway entry rules can always be found here. A special iHeart THANK YOU to Dharma Door for providing myself and my readers the products for this giveaway.
We do a lot of DIY projects, big and small, to save money and create personalized and pretty storage solutions all around our home. There are also times when I turn to the pros and appreciate the craft of others. And there is no storage creating talent that I have found to be more lovely than the storage provided by this week's giveaway sponsor. Say hello to Dharma Door!
Founded in 2004 by Australian Shannon Sheedy, The Dharma Door is where Fair Trade meets fine living. After spending a year traveling and teaching throughout Vietnam, Nepal & India, Shannon and her husband Mick followed their dream of creating products that combine good design with ethical production.
Fast-forward nearly ten years and The Dharma Door has grown to become one of the leading sources for contemporary Fair Trade and sustainable homewares throughout Australia and New Zealand. Building their relationships with producer partners and artisans, as well as a network of wholesale and retail clients, they next set their sights on expanding the brand to the US market.
William & Katie Berg first met Shannon & Mick on a bus ride in Vietnam in early 2003. Friendship took root in youthful travel and over the years has grown to include a new business venture, bringing this gorgeous brand to the North American marketplace. Drawing on their backgrounds in French antiques and film production, they bring a unique set of skills to the table. Launched in the spring of 2014, The Dharma Door USA has exceeded all expectations. The first shipment of goods sold out in just a few weeks time. Growing steadily over the next several months, the response from customers across the country has been amazing.
The Dharma Door products are made by hand using traditional techniques in modern forms. All of the artisans work within Fair Trade groups focusing on providing healthcare, education and fair wages. Every item produced is beautifully designed and impeccably crafted - each stitch & fiber tells a story.
It is the mission of The Dharma Door to bring Fair Trade goods to a new marketplace, bridging the gap between ethical production and contemporary style. They believe that our choices as consumers make a difference in the world, from the food we buy, to the products we use & love in our home, small actions lead to big change.
Simply stunning storage at its best, I couldn't love Dharma Door storage more.
This week, TWO of you lucky readers will have the opportunity to add these delightful bins to your own homes.
First winner selected will receive one loomed basket of their choice (which I find makes for amazing portable laundry storage) while the second winner drawn can choose one Hessian Sack and one Hessian Duo Set (perfect for toting around toiletries or craft supplies). Winner's choice of color & pattern.
a Rafflecopter giveaway
IHeart Organizing readers can now receive 15% OFF using code IHEARTORGANIZING at the Dharma Door's Online Website.
Good luck everyone! IHeart Organizing official giveaway entry rules can always be found here. A special iHeart THANK YOU to Dharma Door for providing myself and my readers the products for this giveaway.
As our oldest son continues to eat his veggies and grow into a teen, we have been very slowly making updates and tweaks to his bedroom. The goal is to give it a little more sophistication and to give him a space that will fit his needs through high school, yet encompasses his personality as well.
You would think that after living with three little guys and a hubby for the previous 14+ years, I would be able to decorate a space for boys without much thought. Not the case at all. In fact, I still find it extremely challenging. My common color plan of neutral grays and blues paired with playful accents of teal and pink, which marries our boy and girl common spaces, does not apply to the boy's personal spaces. They like oranges and reds paired with less white and more wood tones.
So when our oldest spilled some water on his nightstand (and then left it for a few days), the top of it was donzo. And being a cheapy laminate version from Target, there was no chance of sanding things down and fixing it. Although it had seen better days, I was able to salvage the hardware and the drawer components before kicking the frame to the curb.
Using the previous drawer measurements, we set out to DIY a new nightstand for our growing buddy.

Knowing that we had an upcoming copper color challenge with some fellow blogger pals, I selected a warm walnut toned stain which I paired with copper hardware. Because the piece was being stained, I picked out a nicer maple plywood to work with. The entire nightstand was built out of a 4'x4' piece of the maple, which will be nice and sturdy and hopefully last for years to come.
Below is a quick look at the design plan.

To create the outer frame, we created a simple box using our Kreg jig.

The jig allowed us to screw down into the wood at an angle, and prevents the need to utilize nails and screws on the exterior of the furniture.
We followed a similar method to create the base (a second simple box).
As I mentioned, we already had the drawer pieces and hardware from the previous nightstand. That meant we just needed to create a new drawer face. To affix the face, we would have to measure the previous face and create matching slots.
The slit along the bottom was created by running the face of the board over the table saw two times.

The holes (to attach to the pegs of the previous drawer) were created using appropriately sized drill bits and only drilling about 1/2 down into the drawer face.

Once everything was assembled, we used a stainable birch iron-on edging to clean up the exposed edges of the nightstand.

Once completely built, I pulled it inside for a quick photoshoot.

Simple box frame, check. Simple box base, check. New drawer face, check!

We also had a separate piece of smooth birch paneling for the back piece, which we stained prior to attaching it later in the process.
When it came to staining the nightstand, I went straight to my existing stain collection and grabbed the same dark walnut color that we used on the top of our built-in bookcases.

The different wood type (maple), meant that the stain didn't soak into the wood in the same fashion as the pine we had used with the last project. I noticed some very minimal brush marks after the first application, so in-between coats I used a very fine grit sanding block to eliminate those lines and smooth down the finish a bit.

For the second coat, I found it to be much better to apply the stain/poly combo with a soft cotton rag. No more marks and a nice pretty finish.

Because the stain had built-in poly, there was no need to add any additional protective finishes. The nightstand dried in a semi-gloss protective finish.
For the copper hardware, I first tried to gild some brass corners and the ring pull. The gilding didn't stick to the hardware at all, so I turned to plan B which was a brilliant copper spray paint. Instant shiny copper finish!

To match the screw heads to the brass brackets, I just sprayed a small amount of the copper spray paint into a disposable cup and used a q-tip to touch things up.

And done!


I was running low on light so I popped the nightstand near our son's window to take these photos. The warmth of the sunset pouring in really pulled out the walnut finish. I will be taking some more photos of the entire space very soon.

The copper is a subtle compliment to the warm walnut stain.

Although the nightstand really isn't my personal style, our oldest totally digs it. And when he made a comment that his favorite part was that his dad built it for him, my heart melted and oozed and fluttered and even did a few cartwheels.

Although I have no control over how quickly my son grows, I don't want his room to be too sophisticated. So now that we have this beautiful piece, I am scheming up a few ways to bring back in some playful teenage-esque finishes to the space.

And I don't know if you have heard, but copper is the new gold. It is hot right now, and that is why we selected it for this quarter's color challenge. You can see how my fellow blogger pals incorporated copper into their projects by checking out the links below.
Previous color challenge posts include: Pink, Gold and Purple.

You would think that after living with three little guys and a hubby for the previous 14+ years, I would be able to decorate a space for boys without much thought. Not the case at all. In fact, I still find it extremely challenging. My common color plan of neutral grays and blues paired with playful accents of teal and pink, which marries our boy and girl common spaces, does not apply to the boy's personal spaces. They like oranges and reds paired with less white and more wood tones.
So when our oldest spilled some water on his nightstand (and then left it for a few days), the top of it was donzo. And being a cheapy laminate version from Target, there was no chance of sanding things down and fixing it. Although it had seen better days, I was able to salvage the hardware and the drawer components before kicking the frame to the curb.
Using the previous drawer measurements, we set out to DIY a new nightstand for our growing buddy.
Knowing that we had an upcoming copper color challenge with some fellow blogger pals, I selected a warm walnut toned stain which I paired with copper hardware. Because the piece was being stained, I picked out a nicer maple plywood to work with. The entire nightstand was built out of a 4'x4' piece of the maple, which will be nice and sturdy and hopefully last for years to come.
Below is a quick look at the design plan.
To create the outer frame, we created a simple box using our Kreg jig.
The jig allowed us to screw down into the wood at an angle, and prevents the need to utilize nails and screws on the exterior of the furniture.
We followed a similar method to create the base (a second simple box).
As I mentioned, we already had the drawer pieces and hardware from the previous nightstand. That meant we just needed to create a new drawer face. To affix the face, we would have to measure the previous face and create matching slots.
The slit along the bottom was created by running the face of the board over the table saw two times.
The holes (to attach to the pegs of the previous drawer) were created using appropriately sized drill bits and only drilling about 1/2 down into the drawer face.
Once everything was assembled, we used a stainable birch iron-on edging to clean up the exposed edges of the nightstand.
Once completely built, I pulled it inside for a quick photoshoot.
Simple box frame, check. Simple box base, check. New drawer face, check!
We also had a separate piece of smooth birch paneling for the back piece, which we stained prior to attaching it later in the process.
When it came to staining the nightstand, I went straight to my existing stain collection and grabbed the same dark walnut color that we used on the top of our built-in bookcases.
The different wood type (maple), meant that the stain didn't soak into the wood in the same fashion as the pine we had used with the last project. I noticed some very minimal brush marks after the first application, so in-between coats I used a very fine grit sanding block to eliminate those lines and smooth down the finish a bit.
For the second coat, I found it to be much better to apply the stain/poly combo with a soft cotton rag. No more marks and a nice pretty finish.
Because the stain had built-in poly, there was no need to add any additional protective finishes. The nightstand dried in a semi-gloss protective finish.
For the copper hardware, I first tried to gild some brass corners and the ring pull. The gilding didn't stick to the hardware at all, so I turned to plan B which was a brilliant copper spray paint. Instant shiny copper finish!
To match the screw heads to the brass brackets, I just sprayed a small amount of the copper spray paint into a disposable cup and used a q-tip to touch things up.
And done!
I was running low on light so I popped the nightstand near our son's window to take these photos. The warmth of the sunset pouring in really pulled out the walnut finish. I will be taking some more photos of the entire space very soon.
The copper is a subtle compliment to the warm walnut stain.
Although the nightstand really isn't my personal style, our oldest totally digs it. And when he made a comment that his favorite part was that his dad built it for him, my heart melted and oozed and fluttered and even did a few cartwheels.
Although I have no control over how quickly my son grows, I don't want his room to be too sophisticated. So now that we have this beautiful piece, I am scheming up a few ways to bring back in some playful teenage-esque finishes to the space.
And I don't know if you have heard, but copper is the new gold. It is hot right now, and that is why we selected it for this quarter's color challenge. You can see how my fellow blogger pals incorporated copper into their projects by checking out the links below.
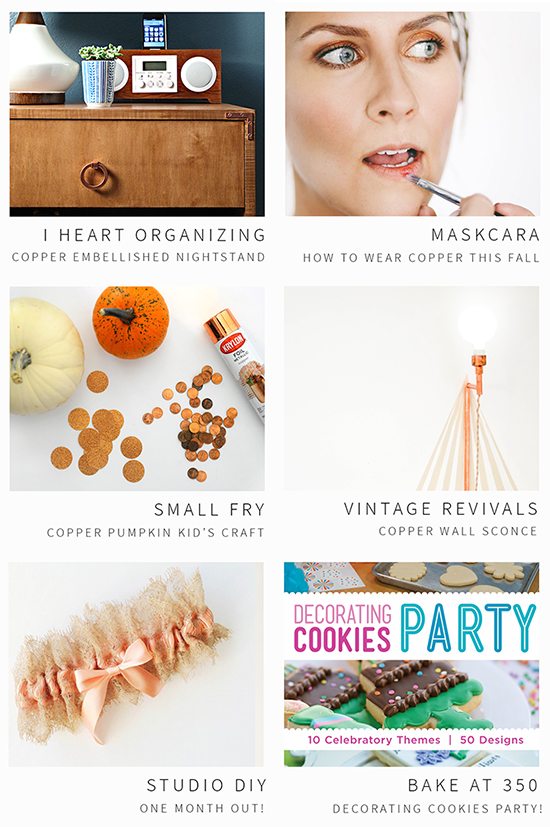 |
| Maskara Copper Makeup Tip / Small Fry Copper Pumpkins / Vintage Revivals Copper Wall Sconce / Studio DIY One Month Out / Bake @ 350 Decorating Cookies Party |
Previous color challenge posts include: Pink, Gold and Purple.
Subscribe to:
Comments (Atom)


